
How do I activate an eSIM on iPhone 13?
Good to know first: Setting up your BuddySIM eSIM takes two steps – installing and activating. You can install it (scan the QR code, enter the details manually or via link) any time right after purchase. The eSIM is then on your device, but not yet active.
You activate the eSIM by turning on data roaming and selecting it as the line for mobile data. Important: activation can only happen in the destination country – only there does the eSIM connect to the local network, and only then does your plan's validity period start (except for global or Europe bundles, where Germany also counts as a destination).
Prefer a video? Here's the video guide.
- Open the Settings on your iPhone 13.
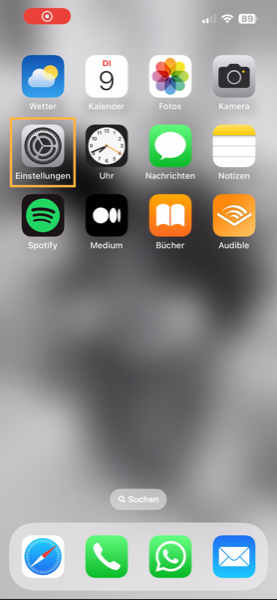
- Open the “Cellular” menu item.
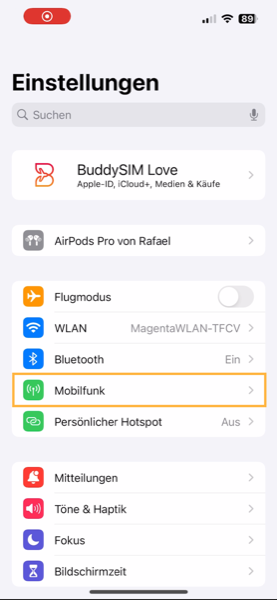
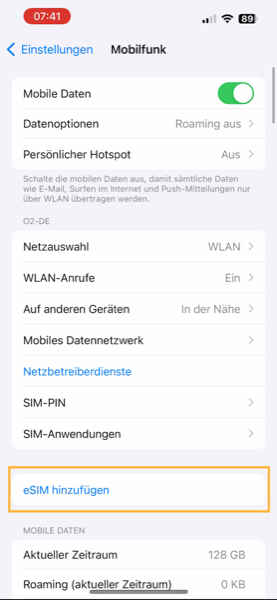
- Go to “Add eSIM”.
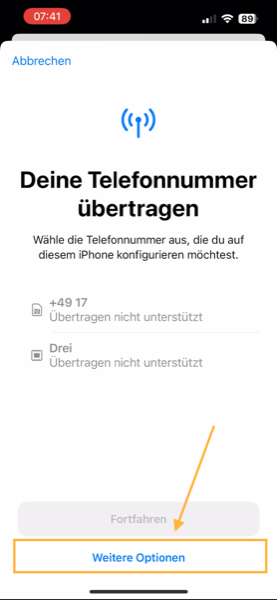
- Choose “Other Options”.
- Open “Use QR Code”.
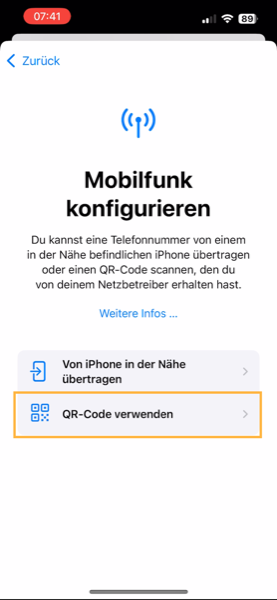
- Scan the QR code from our email.
Note: if you get an error (“Cannot add eSIM”), the eSIM is usually installed anyway. In that case continue from step 15 – the eSIM is then often called “Secondary”, “Business” or “Travel”.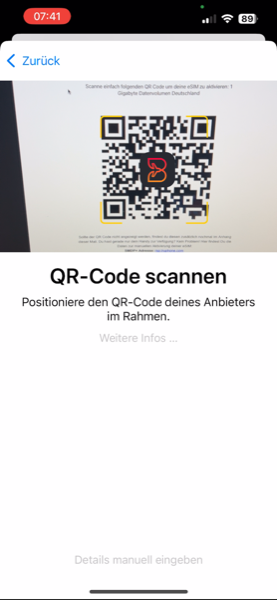
- Continue with the activation.
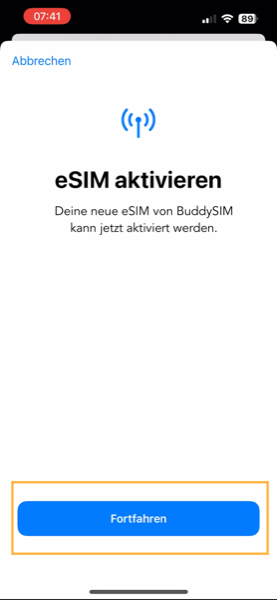
- The eSIM is now activated automatically.
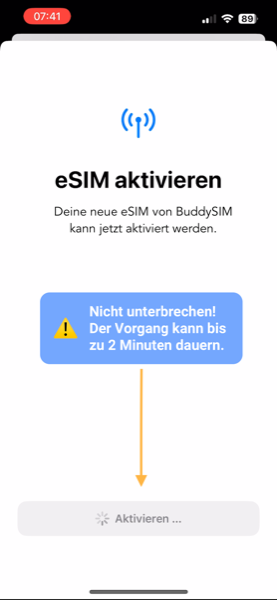
- The installation is then complete.
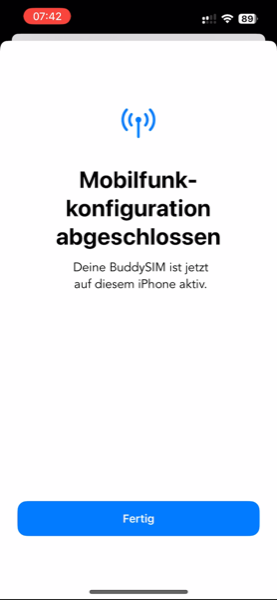
- Now rename your eSIM (the “label”).
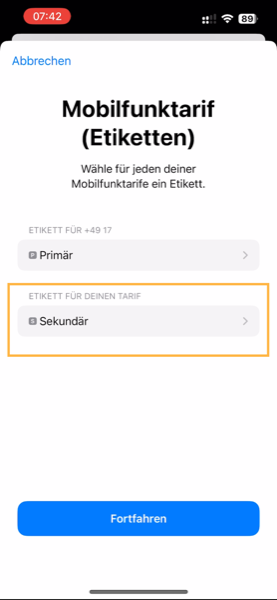
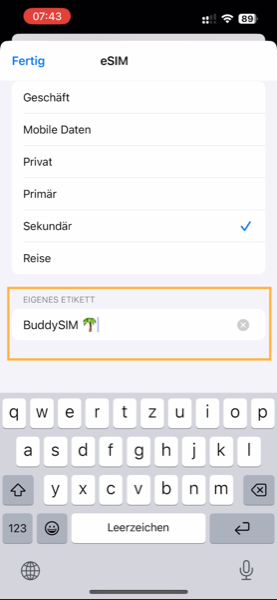
- We recommend the name “BuddySIM”.
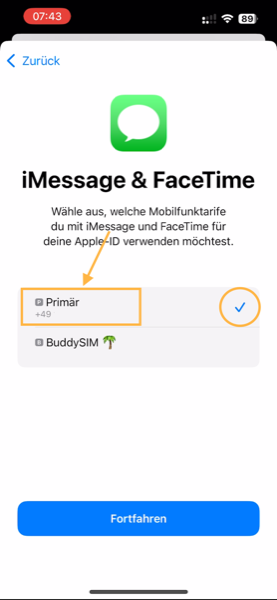
- For calls, choose the “Primary” line.
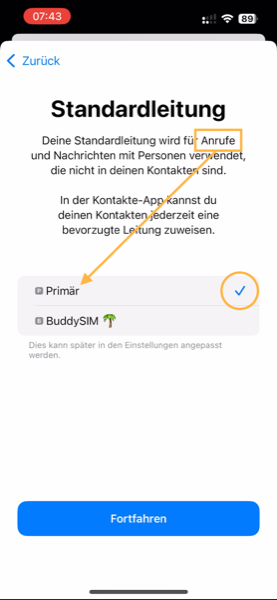
- Choose “Primary” for iMessage & FaceTime too.
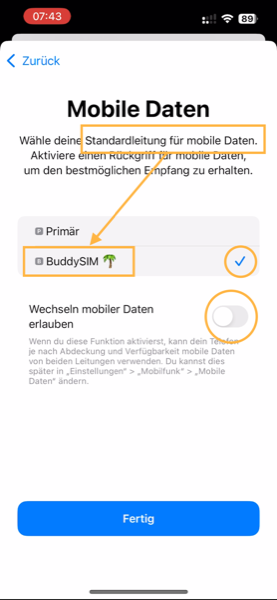
- For mobile data, choose your “BuddySIM”. “Allow Mobile Data Switching” must be OFF.
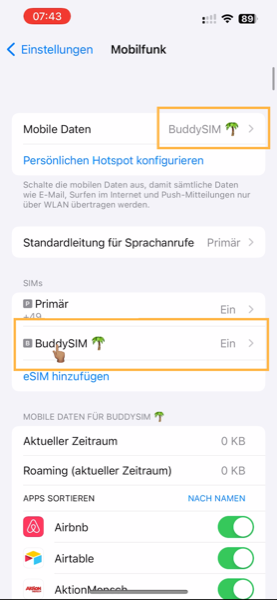
- Under “Mobile Data” the eSIM should now be selected as the line. Then open the eSIM tab (usually under your phone number).
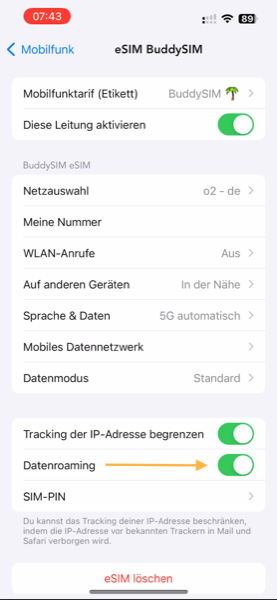
- Turn on Data Roaming for the eSIM.
- Switch the data mode to “Allow 5G”.
If this option doesn't appear, that's fine – just continue.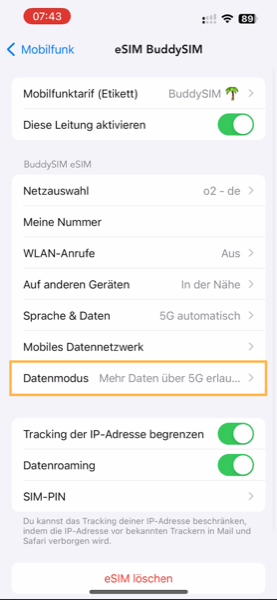
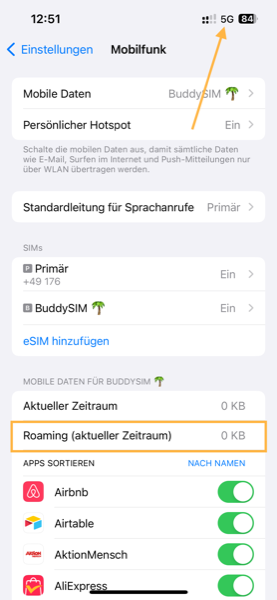
- Your BuddySIM is now active. Under “Roaming (current period)” you can check your usage any time.
- Open the Settings on your iPhone 13.
- Open the “Cellular” menu item.
- Go to “Add eSIM”.
- Choose “Other Options”.
- Open “Use QR Code”.
- Go to “Enter Details Manually”.
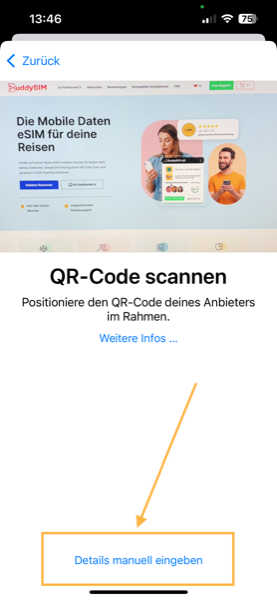
- Enter the activation details from our email ( without https://).
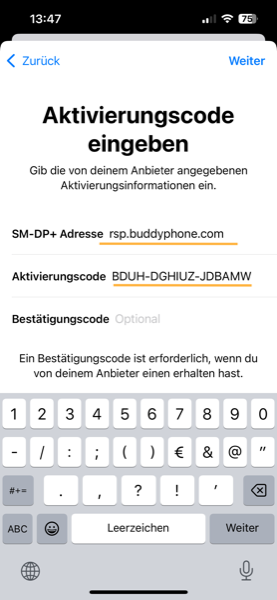
- Continue with the activation.
- The eSIM is now activated automatically.
- The installation is then complete.
- Now rename your eSIM (the “label”).
- We recommend the name “BuddySIM”.
- For calls, choose the “Primary” line.
- Choose “Primary” for iMessage & FaceTime too.
- For mobile data, choose your “BuddySIM”. “Allow Mobile Data Switching” must be OFF.
- Under “Mobile Data” the eSIM should now be selected as the line. Then open the eSIM tab.
- Turn on Data Roaming for the eSIM.
- Switch the data mode to “Allow 5G”.
- Your BuddySIM is now active.
New & fastest: Since iOS 17.4 you can install your eSIM with a single tap – no QR code or manual entry needed.
- Open the confirmation email from BuddySIM directly on your iPhone 13.
- Tap the activation link (“Install eSIM”). Your iPhone automatically opens the eSIM setup.
- Confirm “Add eSIM” and follow the on-screen steps.
- Rename the eSIM to “BuddySIM” and select it as the line for mobile data (see steps 10–15 in the QR code tab).
- In your destination country, turn on Data Roaming for the eSIM – done!
Questions or need help with activation?
Our support team is happy to help – via WhatsApp, email or phone.